之前使用xunsearch一直心理不太舒服,特别是迅搜的分词没有IK做得好,所以22事业有成的我干脆全款拿下了个4核8G的云服务器进行博客的搭建。(图片看不清请左键点击图片)
一、Elasticsearch安装与运行
个人比较偏向新版,但因为扩展包版本原因限制选择es版本为8.0以下 因为扩展包es-php版本仅支持到7.11.0
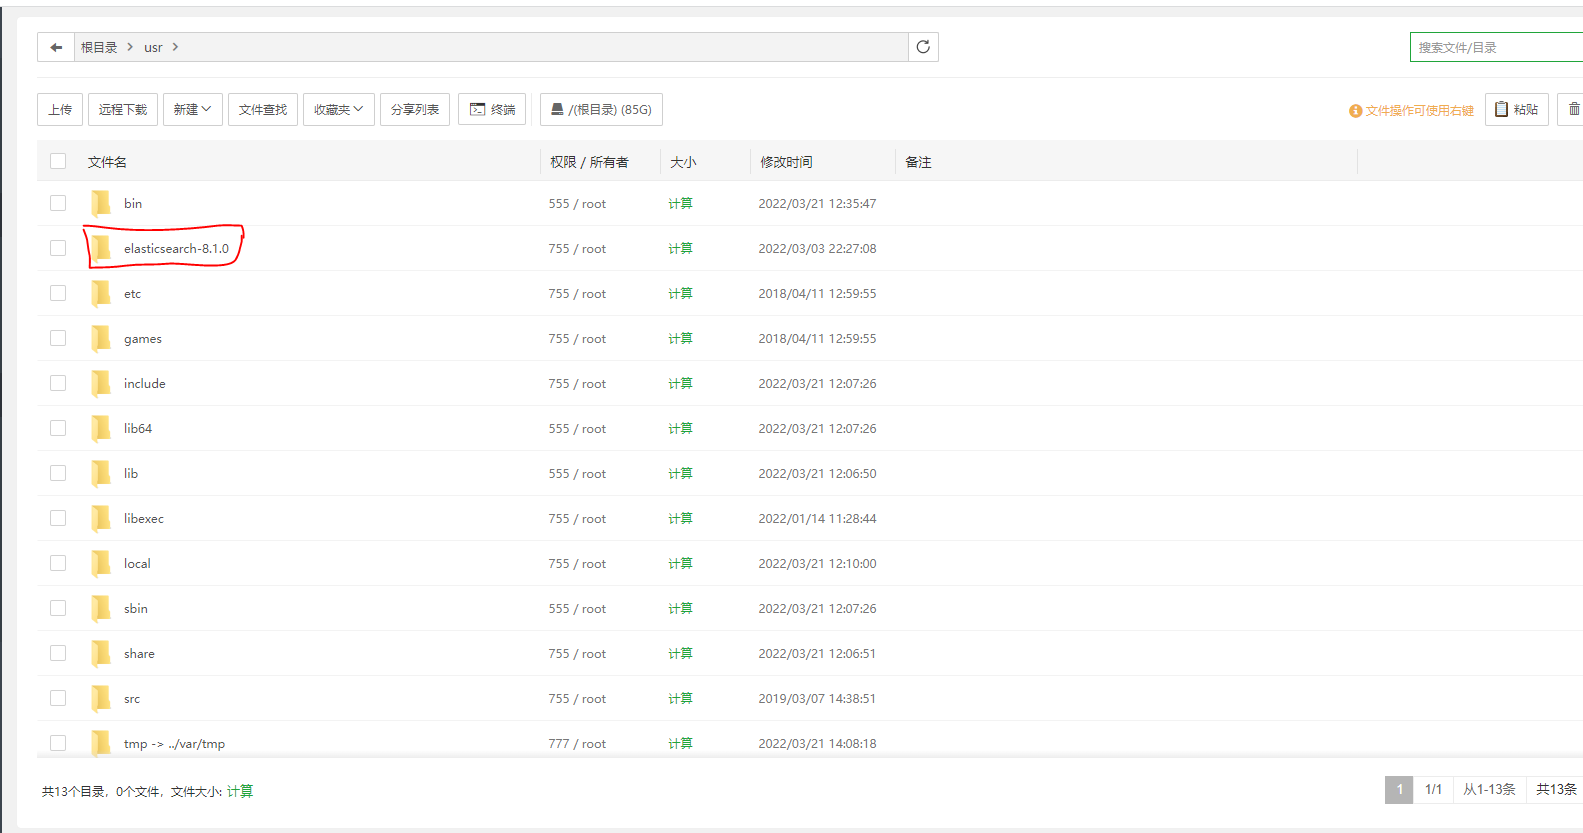
1.因为本人经常做外包所以个人认为宝塔的效率很好,也可以当做个图形化管理工具,所以直接下载ES压缩包用宝塔上传解压到usr文件夹下
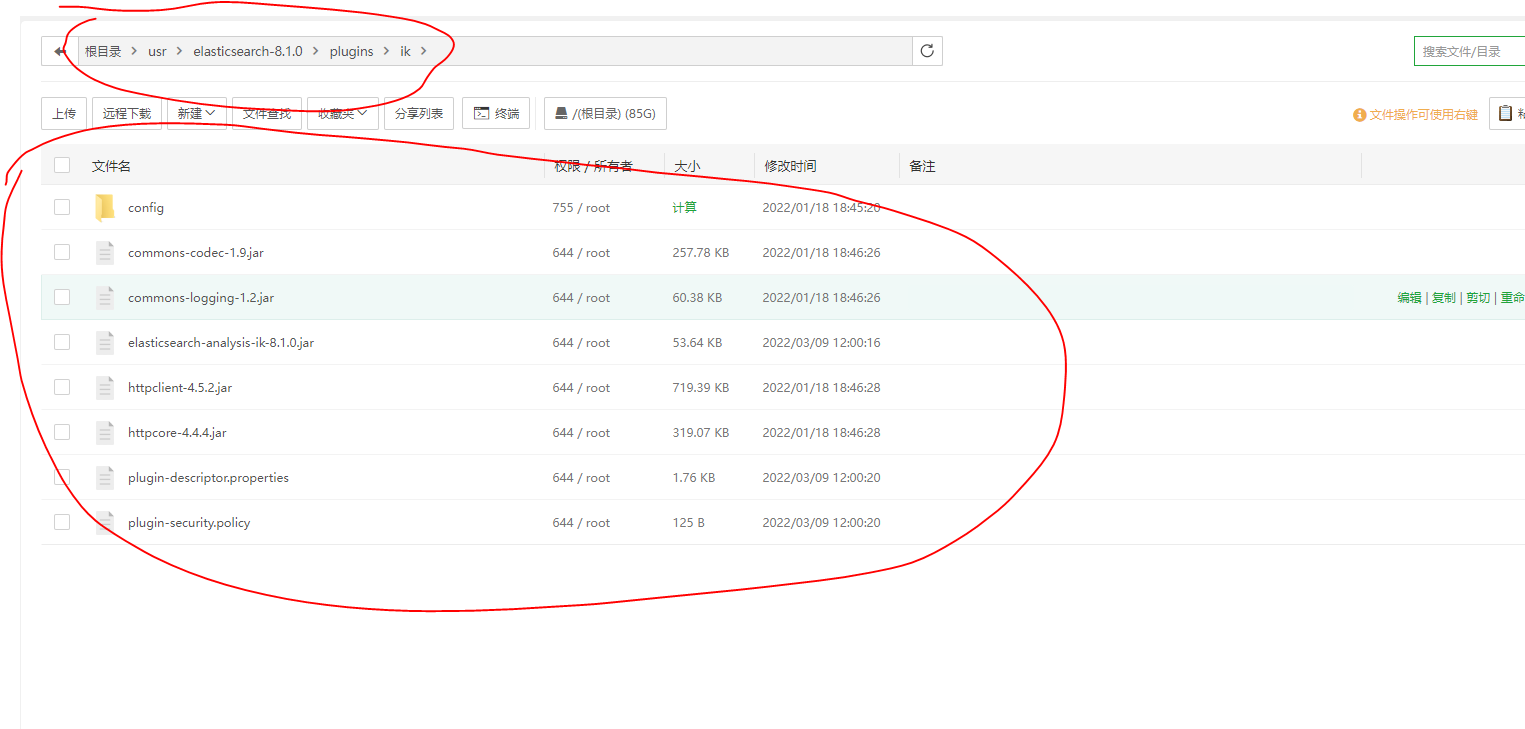
2.将IK分词器上传解压到ES安装根目录的plugins下新建ik的文件夹下面
3.修改ES/config/elasticsearch.yml文件配置(可以让外网访问到)根据个人情况更改
#这是集群名字,起名为elasticsearch
#es启动后会将具有相同集群名字的节点放到一个集群下。
cluster.name:  elasticsearch
#
#节点名字。
node.name: "node1"
#
# 数据存储位置,配置之后该目录会自动生成
path.data: /usr/java/elasticsearch/elasticsearch-6.3.2/data
#
# 日志文件的路径,配置之后该目录会自动生成
path.logs: /usr/java/elasticsearch/elasticsearch-6.3.2/logs
#
#
#设置绑定的ip地址,可以是ipv4或ipv6的,默认为0.0.0.0
#network.bind_host: xxxxxx
#
#设置其它节点和该节点交互的ip地址,如果不设置它会自动设置,值必须是个真实的ip地址
#network.publish_host: xxxxxx
#
#同时设置bind_host和publish_host上面两个参数,该地址为默认地址
network.host: 0.0.0.0
#
#
# 设置节点间交互的tcp端口,默认是9300
#transport.tcp.port: 9300
#
# 设置是否压缩tcp传输时的数据,默认为false,不压缩
transport.tcp.compress: true
#
# 设置对外服务的http端口,默认为9200
#http.port: 9200
#
# 使用http协议对外提供服务,默认为true,开启
#http.enabled: false
#
#discovery.zen.ping.unicast.hosts:["节点1的 ip","节点2 的ip","节点3的ip"]
#这是一个集群中的主节点的初始列表,当节点(主节点或者数据节点)启动时使用这个列表进行探测
discovery.zen.ping.unicast.hosts: ["你的IP地址"]
#
#指定集群中的节点中有几个有master资格的节点。
#对于大集群可以写(2-4)。
discovery.zen.minimum_master_nodes: 1
#解决head的集群健康值问题,后续会安装head插件
http.cors.enabled: true
http.cors.allow-origin: "*"
http.cors.allow-headers: Authorization,X-Requested-With,Content-Length,Content-Type
以下是我个人配置:
# ======================== Elasticsearch Configuration =========================
#
# NOTE: Elasticsearch comes with reasonable defaults for most settings.
#       Before you set out to tweak and tune the configuration, make sure you
#       understand what are you trying to accomplish and the consequences.
#
# The primary way of configuring a node is via this file. This template lists
# the most important settings you may want to configure for a production cluster.
#
# Please consult the documentation for further information on configuration options:
# https://www.elastic.co/guide/en/elasticsearch/reference/index.html
#
# ---------------------------------- Cluster -----------------------------------
#
# Use a descriptive name for your cluster:
#
cluster.name: elasticsearch
#
# ------------------------------------ Node ------------------------------------
#
# Use a descriptive name for the node:
#
node.name: node-1
#
# Add custom attributes to the node:
#
#node.attr.rack: r1
#
# ----------------------------------- Paths ------------------------------------
#
# Path to directory where to store the data (separate multiple locations by comma):
#
#path.data: /path/to/data
#
# Path to log files:
#
#path.logs: /path/to/logs
#
# ----------------------------------- Memory -----------------------------------
#
# Lock the memory on startup:
#
#bootstrap.memory_lock: true
#
# Make sure that the heap size is set to about half the memory available
# on the system and that the owner of the process is allowed to use this
# limit.
#
# Elasticsearch performs poorly when the system is swapping the memory.
#
# ---------------------------------- Network -----------------------------------
#
# By default Elasticsearch is only accessible on localhost. Set a different
# address here to expose this node on the network:
#
network.host: 0.0.0.0
#
# By default Elasticsearch listens for HTTP traffic on the first free port it
# finds starting at 9200. Set a specific HTTP port here:
#
http.port: 9200
#
# For more information, consult the network module documentation.
#
# --------------------------------- Discovery ----------------------------------
#
# Pass an initial list of hosts to perform discovery when this node is started:
# The default list of hosts is ["127.0.0.1", "[::1]"]
#
#discovery.seed_hosts: ["host1", "host2"]
#
# Bootstrap the cluster using an initial set of master-eligible nodes:
#
#cluster.initial_master_nodes: ["node-1", "node-2"]
cluster.initial_master_nodes: ["node-1"]
#
# For more information, consult the discovery and cluster formation module documentation.
#
# ---------------------------------- Various -----------------------------------
#
# Allow wildcard deletion of indices:
#
#action.destructive_requires_name: false
xpack.security.enabled: false
xpack.security.transport.ssl.enabled: false
http.cors.enabled: true
http.cors.allow-origin: "*"
4.ES不能以root启动,我们新建一个启动用户
useradd espasswd es
设置密码后赋予权限chown -R es:es elasticsearch-8.1.0
输入密码进入到用户就ok了
5.修改limits.conf与sysctl.conf文件的系统参数(root用户下)
(1)在/etc/security/limits.conf文件追加* soft nproc 65536* hard nproc 65536es soft nofile 65536es hard nofile 65536
(2)在/etc/sysctl.config追加
vm.max_map_count=262144
(3)最后执行命令sysctl -p
附:可自行决定是否限制es的使用内存大小
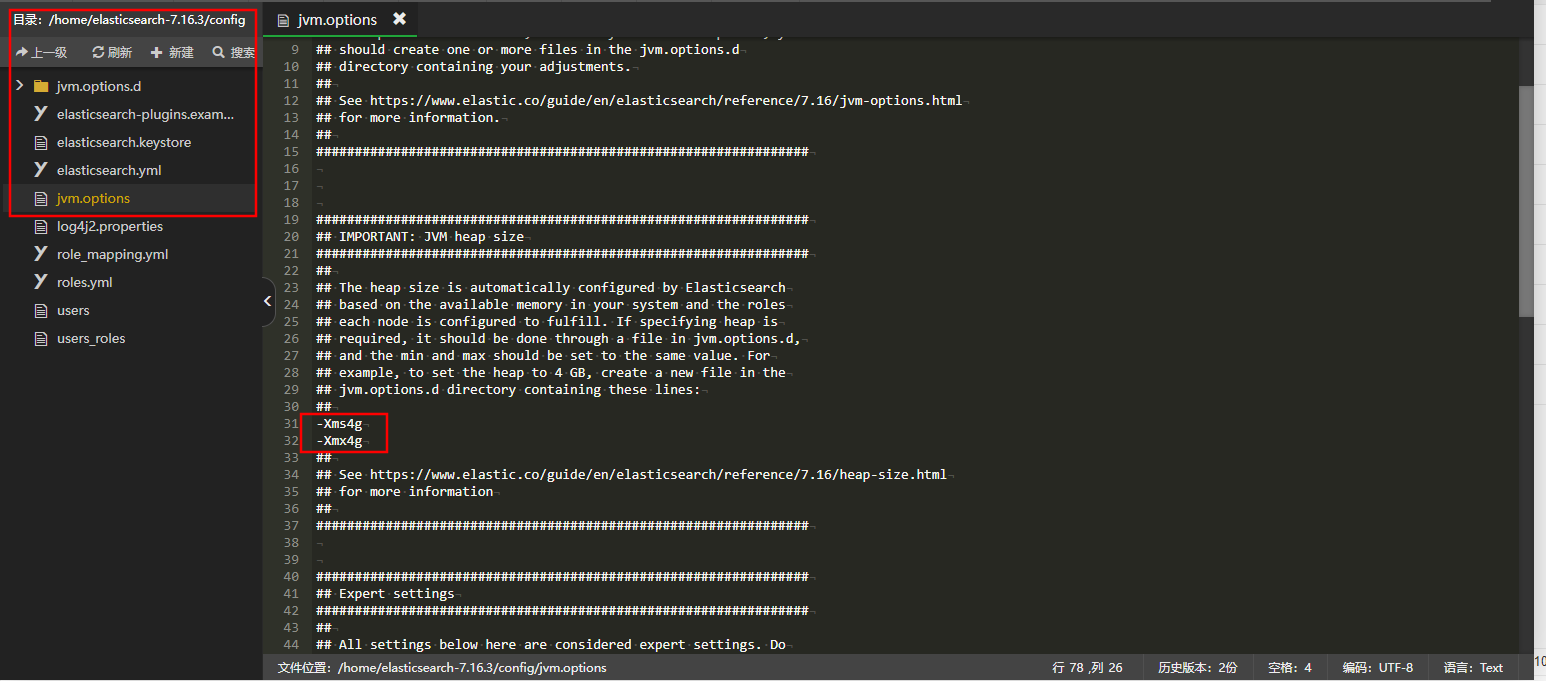
(1) 去掉注释并修改 ES根目录/config/jvm.options文件中的 -xms和-xmx的值 下面以限制4g内存为例
6.启动ES(在ES根目录)
(1)进入es用户:su es
(2)执行命令启动: ./bin/elasticsearch
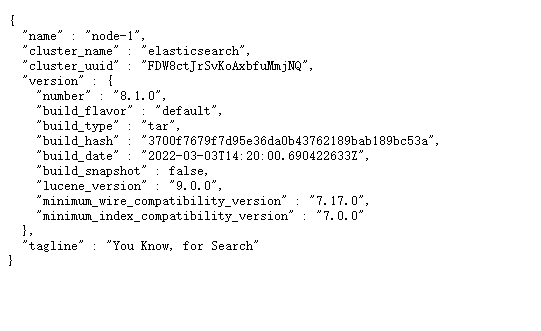
(3)本地测试命令:curl "http://127.0.0.1:9200"
(4)外网测试: 域名:9200(服务器要放行端口)
如下图所示表示成功启动
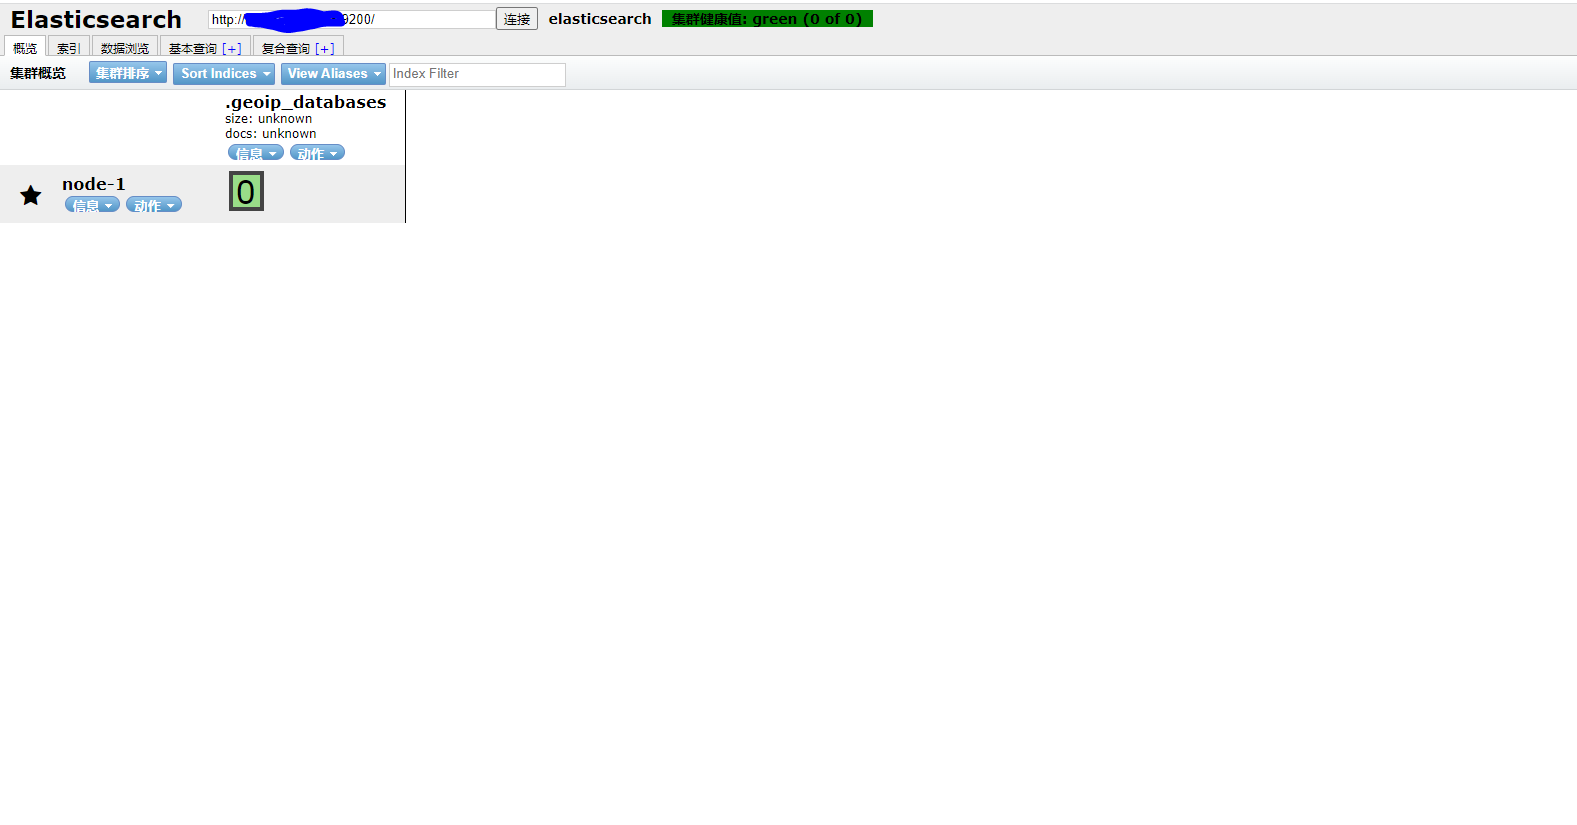
7.为了方便观察我们可以加入elasticsearch-head
(1)下载Elasticsearch-head
(2)上传解压到/usr目录下
(3)在根目录运行 npm install(换成国内淘宝源 npm config set registry https://registry.npm.taobao.org
)
(4)运行命令 npm run start
(5)修改默认连接地址
修改/usr/elasticsearch-head/_site/app.js文件下的参数
将this.base_uri = this.config.base_uri;更改为this.base_uri = this.config.base_uri || this.prefs.get("app-base_uri") || "http://你的域名:9200";
(6)最后访问域名:9100(放行)
结果如下图所示
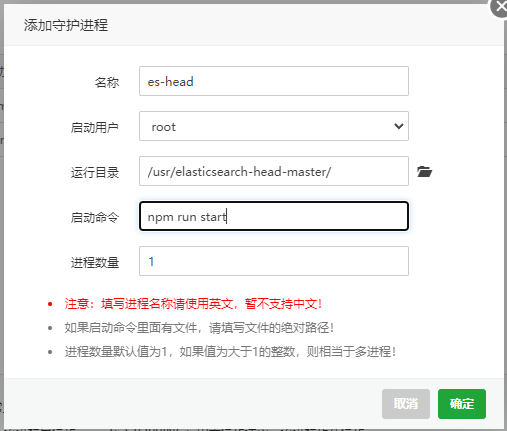
8.加入守护进程
宝塔下载supervisor
(1)ES配置如下

!!!这里有个巨坑,就是宝塔的supervisor自己有个文件限制,所以正常用户启动没有问题,但是supervisor就报错
ERROR: [2] bootstrap checks failed
[1]: max file descriptors [4096] for elasticsearch process is too low, increase to at least [65536]\
ElasticSearch进程的最大文件描述符[4096]太低,请至少增加到[65536]
[2]: max number of threads [3818] for user [elastic] is too low, increase to at least [4096]
用户[弹性]的最大线程数[3818]太低,请至少增加到[4096]
解决方法就是在supervisor的主配置文件中修改
minfds=1024 ; 这个是最少系统空闲的文件描述符,低于这个值supervisor将不会启动。 系统的文件描述符在这里设置cat /proc/sys/fs/file-max 默认情况下为1024。。。非必须设置
minprocs=200 ; 最小可用的进程描述符,低于这个值supervisor也将不会正常启动。 ulimit -u这个命令,可以查看linux下面用户的最大进程数 默认为200。。。非必须设置
为
[supervisord]
minfds=65536
minprocs=4096
(2)ES-head配置如下
二、Laravel Scout 结合 Elasticsearch 进行全文搜索
1.下载扩展包abenkoivan/scout-elasticsearch-driver
composer require babenkoivan/scout-elasticsearch-driver
2.发布扩展包配置文件
php artisan vendor:publish --provider="Laravel\Scout\ScoutServiceProvider"
php artisan vendor:publish --provider="ScoutElastic\ScoutElasticServiceProvider"
3.修改.env配置
SCOUT_DRIVER=elastic
SCOUT_ELASTIC_HOST=elasticsearch:9200
以上基本的配置就完成了
接下来对我们的article文章表进行全文索引

4.创建索引
每个索引都有一个对应的配置文件,需要通过配置文件创建索引。因为我是线上项目更改所以需要
php artisan config:clear清理配置缓存然后php artisan config:cache存储配置
php artisan make:index-configurator ArticlesIndexConfigurator
php artisan elastic:create-index App\\ArticlesIndexConfigurator
可以修改配置文件,增加自己需要的配置,这里可以不做修改,直接使用默认的,那么默认情况下,索引名称就是配置文件前面的部分 articles。
5.导入数据
(1)我们先为索引生成一个专用模型在app下
php artisan make:model Articles
(2)修改 App\Articles模型如下(根据自己的字段进行索引配置)
<?php

namespace App;

use Illuminate\Database\Eloquent\Model;
use ScoutElastic\Searchable;

class Articles extends Model
{
    use Searchable;

    protected $indexConfigurator = ArticlesIndexConfigurator::class;

    protected $mapping = [
        'properties' => [
            'title' => [
                'type' => 'text',
                'analyzer' => 'ik_max_word'
            ],
            'content' => [
                'type' => 'text',
                'analyzer' => 'ik_smart'
            ],
            'keyword' => [
                'type' => 'text',
                'analyzer' => 'ik_max_word'
            ],
            'desc' => [
                'type' => 'text',
                'analyzer' => 'ik_max_word'
            ],

        ]
    ];

    public function toSearchableArray()
    {
        return [
            'title'=> $this->title,
            'content' => $this->content,
            'keyword' => $this->keyword,
            'desc' => $this->desc,
        ];
    }
}
ik_max_word: 会将文本做最细粒度的拆分,比如会将 “中华人民共和国国歌” 拆分为 “中华人民共和国,中华人民,中华,华人,人民共和国,人民,人,民,共和国,共和,和,国国,国歌”,会穷尽各种可能的组合;
ik_smart: 会做最粗粒度的拆分,比如会将 “中华人民共和国国歌” 拆分为 “中华人民共和国,国歌”。
6.导入文章数据
php artisan scout:import "App\Articles"
最后在搜索时替换即可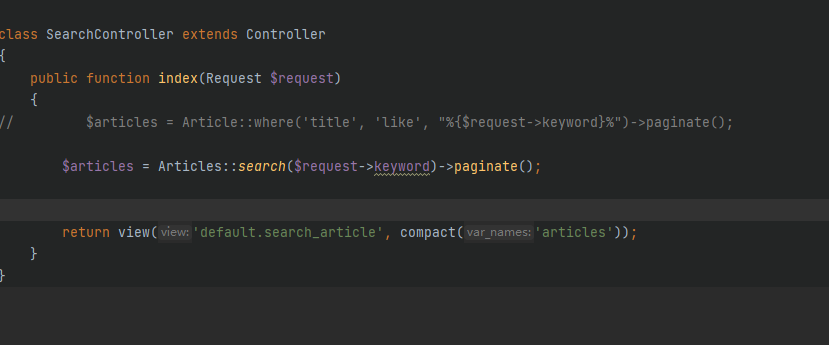
Working

标签
- 6672 Laravel配合Canal实现Elas...
- 2552 关于我的个人简介...
- 1914 Laravel修改线上env配置文件注意...
- 1887 Laravel快速接入 JWT 用户认证...
- 1783 关于宝塔搭建go线上环境以及项目部署...
- 1711 关于秒杀问题解决方法...
- 1703 fastadmin导入导出(需要php7...
- 1665 Laravel集成xunsearch...